

Have you ever wondered how to make your bathroom visits more pleasant? Many people are discovering bidets. Installing a bidet attachment can change your bathroom experience. But, how do you install a bidet attachment? It’s easier than you might think. Read on to find out how you can do it yourself!
Key Takeaways
- Installing a bidet can be simple and quick.
- You need basic tools like a wrench and screwdriver.
- Turn off the water before you start the installation.
- Follow instructions in the bidet kit’s manual.
- Learn how do I install a bidet attachment today!
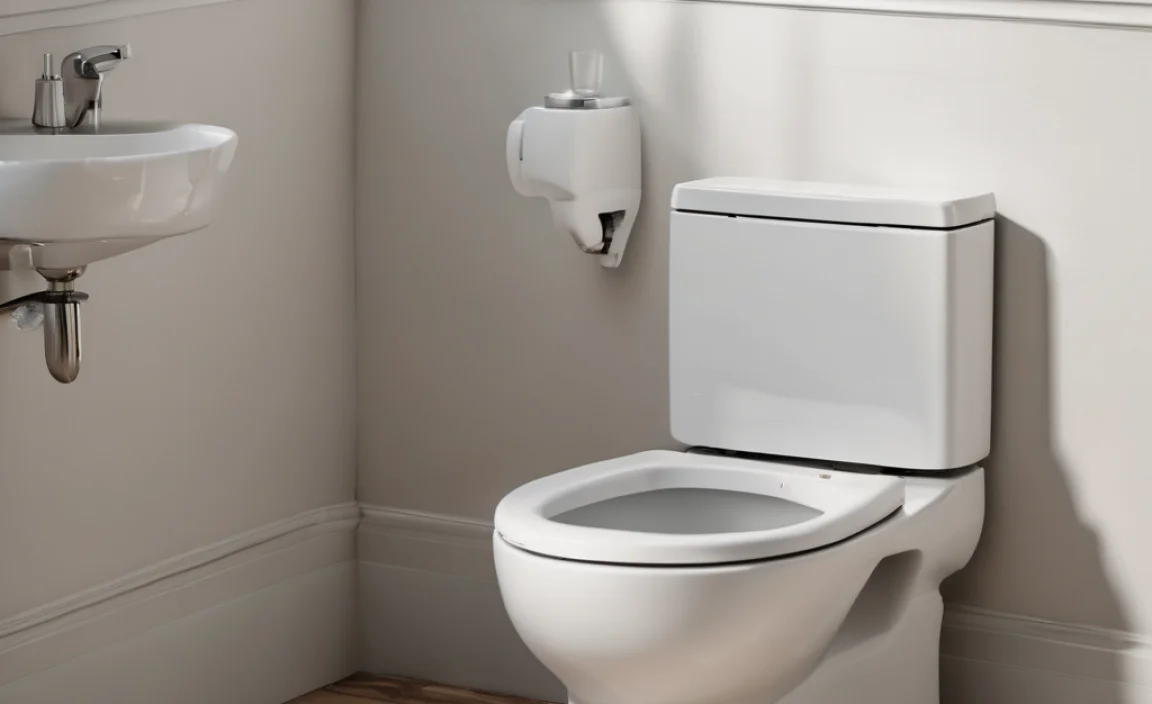
What You Need To Install A Bidet Attachment

Before you start, gather the necessary tools and materials. These usually come with the bidet attachment kit. You will need a screwdriver and wrench. Make sure you have Teflon tape too. This helps prevent leaks. First, read the manual that comes with your bidet kit. It will guide you through the steps. Check that your toilet fits the bidet. Most standard toilets are compatible. If you have questions, the manual is your friend. It’s okay to feel a bit nervous. Remember, many people do this successfully.
- Gather tools like a wrench and screwdriver.
- Read the manual carefully.
- Check your toilet’s compatibility.
- Have Teflon tape to avoid leaks.
- Make sure you understand each step.
Once you have everything ready, you can proceed with installation. Follow the instructions closely. If something is unclear, read it again. Don’t rush the process. Take your time to ensure a proper fit. This way, your bidet will work efficiently. Proper installation avoids leaks and problems later. Enjoy the satisfaction of a job well done!
Fun Fact or Stats: Did you know that over 80% of people in Italy use bidets?
Step 1: Turning Off The Water Supply
First things first, you need to turn off the water supply to your toilet. This is important to avoid any water spills. Locate the water valve, usually behind the toilet. Turn it clockwise to shut off the water. Flush the toilet to empty the tank. This makes installation easier. You don’t want water spilling everywhere. Make sure the water is completely off before proceeding. It’s a simple step, but very important. You don’t need any special skills to do this. Just turn the valve and flush!
- Locate the water valve behind your toilet.
- Turn the valve clockwise to shut it off.
- Flush the toilet to empty the tank.
- Check that no water is refilling the toilet.
- Ensure everything is dry to start work.
Once the water is off, you can move forward with the installation. Take a moment to double-check that no water is left. This prevents any mishaps. It’s a straightforward step, but don’t skip it. Now, you’re ready for the next exciting part. You’ve got this!
Fun Fact or Stats: Newer bidet models can save up to 75% of toilet paper use!
Step 2: Removing The Toilet Seat
Next, you need to remove the toilet seat. This gives you access to install the bidet. Use a screwdriver to unscrew the seat bolts. Keep the bolts in a safe place. You will need them later. Lift the seat carefully off the toilet. Some seats have covers you need to lift first. Check the manual if you’re unsure. The process is not complicated. It just takes a little patience. Once the seat is off, clean the area. A clean surface helps the attachment fit well. Don’t skip cleaning!
- Use a screwdriver to unscrew the seat bolts.
- Store the bolts safely for later use.
- Lift the seat carefully off the toilet.
- Check the manual for special instructions.
- Clean the area around the toilet holes.
After the area is clean, you can proceed to attach the bidet. This step sets the stage for a perfect installation. Take your time to do it right. The better you prepare, the smoother everything will go. Clean surfaces ensure strong attachments. Now, you’re ready for the main event!
Fun Fact or Stats: In Japan, 80% of households have bidets equipped with toilet seats.
Step 3: Attaching The Bidet To The Toilet
Now comes the exciting part—attaching the bidet to the toilet. Align the bidet attachment over the toilet holes. Make sure it’s centered and straight. Use the bolts you kept earlier to secure it in place. Tighten them with your screwdriver. Check for stability. The bidet should not wobble. If it feels loose, tighten the bolts more. Don’t overtighten, though. You don’t want to crack the toilet. Follow the manual for any specific tips. You are almost done!
- Align the bidet over the toilet holes.
- Use bolts to secure the attachment.
- Tighten bolts using a screwdriver.
- Check for stability and correct fit.
- Do not overtighten the bolts.
With the bidet attached, you are almost ready to use it. This step is crucial for a functioning bidet. Take the time to ensure a perfect fit. A stable bidet means fewer problems later. By following these steps, you’re making great progress. Soon, you’ll be testing your new bathroom addition!
Fun Fact or Stats: Some modern bidets have features like heated seats and air dryers!
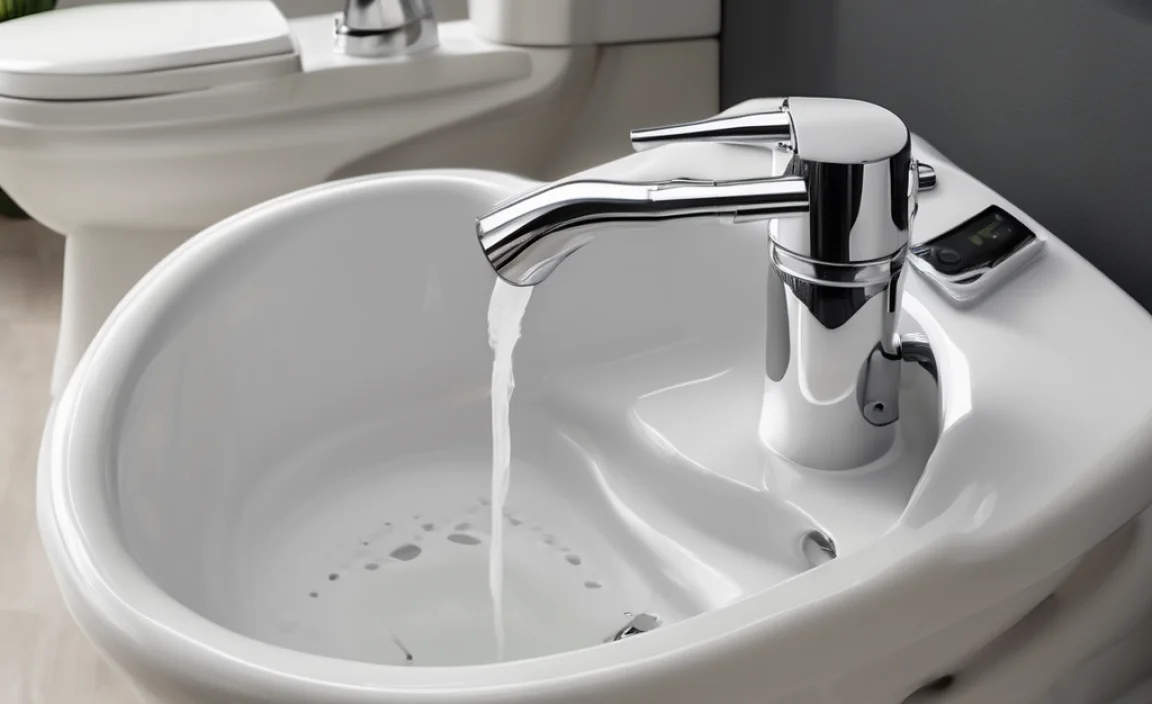
Step 4: Connecting The Water Supply
You’re almost finished! Now, connect the bidet to the water supply. Use the T-shaped connector provided in the kit. Attach one end to the toilet’s water valve. Connect the other end to the bidet. Tighten the connections securely. Use Teflon tape if needed to prevent leaks. Slowly turn the water back on. Watch for any leaks. If you see water, tighten connections more. Once everything is secure, flush the toilet. Make sure everything works smoothly. This final connection brings your bidet to life!
- Use a T-shaped connector for the water supply.
- Attach it to the toilet’s existing water valve.
- Connect the other end to the bidet.
- Use Teflon tape if necessary.
- Turn water back on and test for leaks.
Congratulations! You’ve successfully connected your bidet to the water supply. This is the last major installation step. Turn the water on and off to test. No leaks? Great job! You’ve completed a project that adds comfort to your bathroom. Enjoy your refreshing bathroom upgrade. You’ve earned it!
Fun Fact or Stats: In the US, bidet sales increased by 20% in 2020!
Testing And Adjusting Your New Bidet
Now it’s time to test your new bidet. Turn on the water and give it a try. Sit on the toilet and use the bidet controls. Adjust the water pressure and spray direction. Make sure it’s comfortable for you. If something feels off, make small adjustments. Your bidet is meant to offer comfort. Take a few tries to find the best settings. Don’t worry if it takes a bit to get used to. Bidets can be a refreshing change. Enjoy your new bathroom experience!
- Turn on the water and test the bidet.
- Adjust water pressure to your liking.
- Change spray direction if needed.
- Make sure the settings are comfortable.
- Test multiple times for best results.
Now that your bidet is set up, enjoy the comfort it provides. A perfectly adjusted bidet makes all the difference. Spend a few moments finding what works best. This is the fun part! You’ll soon wonder how you ever lived without it. Welcome to your new and improved bathroom routine!
Fun Fact or Stats: Using a bidet saves about 15 million trees per year by reducing toilet paper usage!
Conclusion
Installing a bidet attachment can be a simple, rewarding project. By following these steps, you learn not just how to install a bidet attachment, but also improve your bathroom experience. Take your time, gather your tools, and read the instructions. Soon, you’ll enjoy a cleaner, more comfortable bathroom routine.
FAQs
Question: How do I install a bidet attachment?
Answer: Start by turning off the water and removing the toilet seat. Attach the bidet and connect the water supply. Finally, test and adjust the settings to your comfort.
Question: Do I need special tools to install a bidet?
Answer: No special tools are required. A standard wrench and screwdriver are usually enough. The kit includes most parts you need. Just ensure you have Teflon tape to prevent leaks.
Question: Can I install a bidet on any toilet?
Answer: Most bidet attachments fit standard toilets. However, it’s best to check your toilet’s compatibility before buying. Some unique toilet designs may require special attachments.
Question: Is it safe to install a bidet myself?
Answer: Yes, it’s safe if you follow the instructions carefully. Turn off water supply before you start. Check for leaks after installation. If unsure, consult the manual or a professional plumber.
Question: Will using a bidet save money?
Answer: Yes, using a bidet reduces toilet paper use. This saves money over time. It’s also better for the environment. Bidets offer a more hygienic and cost-effective solution.
Question: Are bidets difficult to use?
Answer: Not at all! Bidets are simple to use. Most come with easy-to-understand controls. You can quickly adjust settings like water pressure and direction. Give it a few tries to get comfortable.
Related posts:
 How to Charge Tineco Vacuum: Master the Power
 Why is My Vacuum Spitting Out Dirt? Find Effective Solutions!
 How to Clean Quantum X Vacuum: Ultimate Guide
 How Long Does a Miele Vacuum Last? Unveiling Durability Secrets!
 How to Fix Dyson Ball Vacuum: Ultimate Troubleshooting Guide
 Can I Use Fabuloso in My Tineco? Discover the Best Cleaning Solution
 Why is My Vacuum Making a High-Pitched Noise: Troubleshooting Guide
 Why is My Vacuum Not Turning on ? Tips to Troubleshoot and Fix It
 Why Does My Vacuum Belt Keep Breaking? Discover the Solution Today!
 How to Make Dyson Vacuum Smell Better: Quick and Easy Solutions
 Will Robot Vacuum Go Over Threshold? Discover the Power of Autonomous Cleaning
 How to Unclog Dyson Vacuum: Easy Solutions for Clearing Blockages